Data Mapping Pattern
Pattern Overview
The Data Mapping Pattern synchronizes IDs and data between different systems using 8kit's Lookups functionality. This pattern is essential for maintaining data consistency across multiple platforms and databases.
How It Works
Source System ID → Check Lookup → Mapping Exists? → Yes → Use Target ID
                                    ↓
                                   No → Create Target ID → Store Mapping → Use Target ID
Key Benefits
- Seamless integration - Connect systems with different ID formats
- Data consistency - Maintain relationships across platforms
- Bidirectional mapping - Look up IDs in both directions
- Reduced complexity - Handle ID translation automatically
Video Demonstration
Watch this video to see the Data Mapping Pattern in action:
What is the Data Mapping Pattern?
The Data Mapping Pattern uses 8kit's Lookups to create bidirectional mappings between different systems in your n8n workflows. It allows you to:
- Map IDs between different systems (e.g., Shopify customer ID → CRM contact ID)
- Store relationships between data entities
- Synchronize data across multiple platforms
- Maintain referential integrity in distributed n8n workflows
Key Concepts
- Lookup: A bidirectional mapping between two values
- Left System: The system where the original ID exists
- Right System: The system where the mapped ID exists
- Bidirectional: Lookups work in both directions (Left→Right and Right→Left)
When to Use the Data Mapping Pattern
Use the Data Mapping Pattern when you need to:
- Integrate multiple systems with different ID schemes in your n8n workflows
- Maintain data relationships across platforms in n8n workflow executions
- Synchronize customer data between systems using n8n workflows
- Handle data migration between platforms with n8n automation
- Create unified views of distributed data through n8n workflows
Common Use Cases
- E-commerce Integration: Map customer IDs between Shopify and your CRM in n8n workflows
- Multi-platform Data: Sync user data across different applications using n8n
- Data Migration: Map old IDs to new IDs during system migration with n8n
- API Integration: Map internal IDs to external API identifiers in n8n workflows
- Reporting: Create unified reports from multiple data sources using n8n
Implementation Process
The Data Mapping Pattern follows a systematic approach to maintain ID relationships between different systems:
Step 1: Check for Existing Mapping
Before creating new mappings, always check if one already exists:
- Identify the source ID - The identifier from your source system
- Query the Lookup - Check if this source ID has been mapped before
- Retrieve target ID - If mapping exists, get the corresponding target system ID
- Skip creation - If found, use the existing mapping; if not found, proceed to create
Step 2: Create New Mapping
If no mapping exists for the source ID:
- Generate target ID - Create or obtain the ID in the target system
- Validate the mapping - Ensure both IDs are valid and accessible
- Store the relationship - Record the source-to-target ID mapping
- Include metadata - Store creation timestamp, system details, or other context
Step 3: Use the Mapping
Once you have the target ID (either from existing mapping or newly created):
- Execute operations - Use the target ID for API calls, database operations, etc.
- Maintain consistency - Ensure all related operations use the same mapping
- Handle errors - Plan for cases where target system operations fail
- Update if needed - Modify mappings when target IDs change
Key Principles
- Always check first - Never create duplicate mappings
- Maintain consistency - Use the same mapping for all related operations
- Handle failures gracefully - Plan for target system unavailability
- Use descriptive names - Choose clear, meaningful lookup names
- Validate mappings - Ensure both source and target IDs are valid
- Add logic to use the mapping in both branches
- If mapping exists: Use the existing target ID
- If mapping created: Use the newly created target ID
- Continue with your business logic
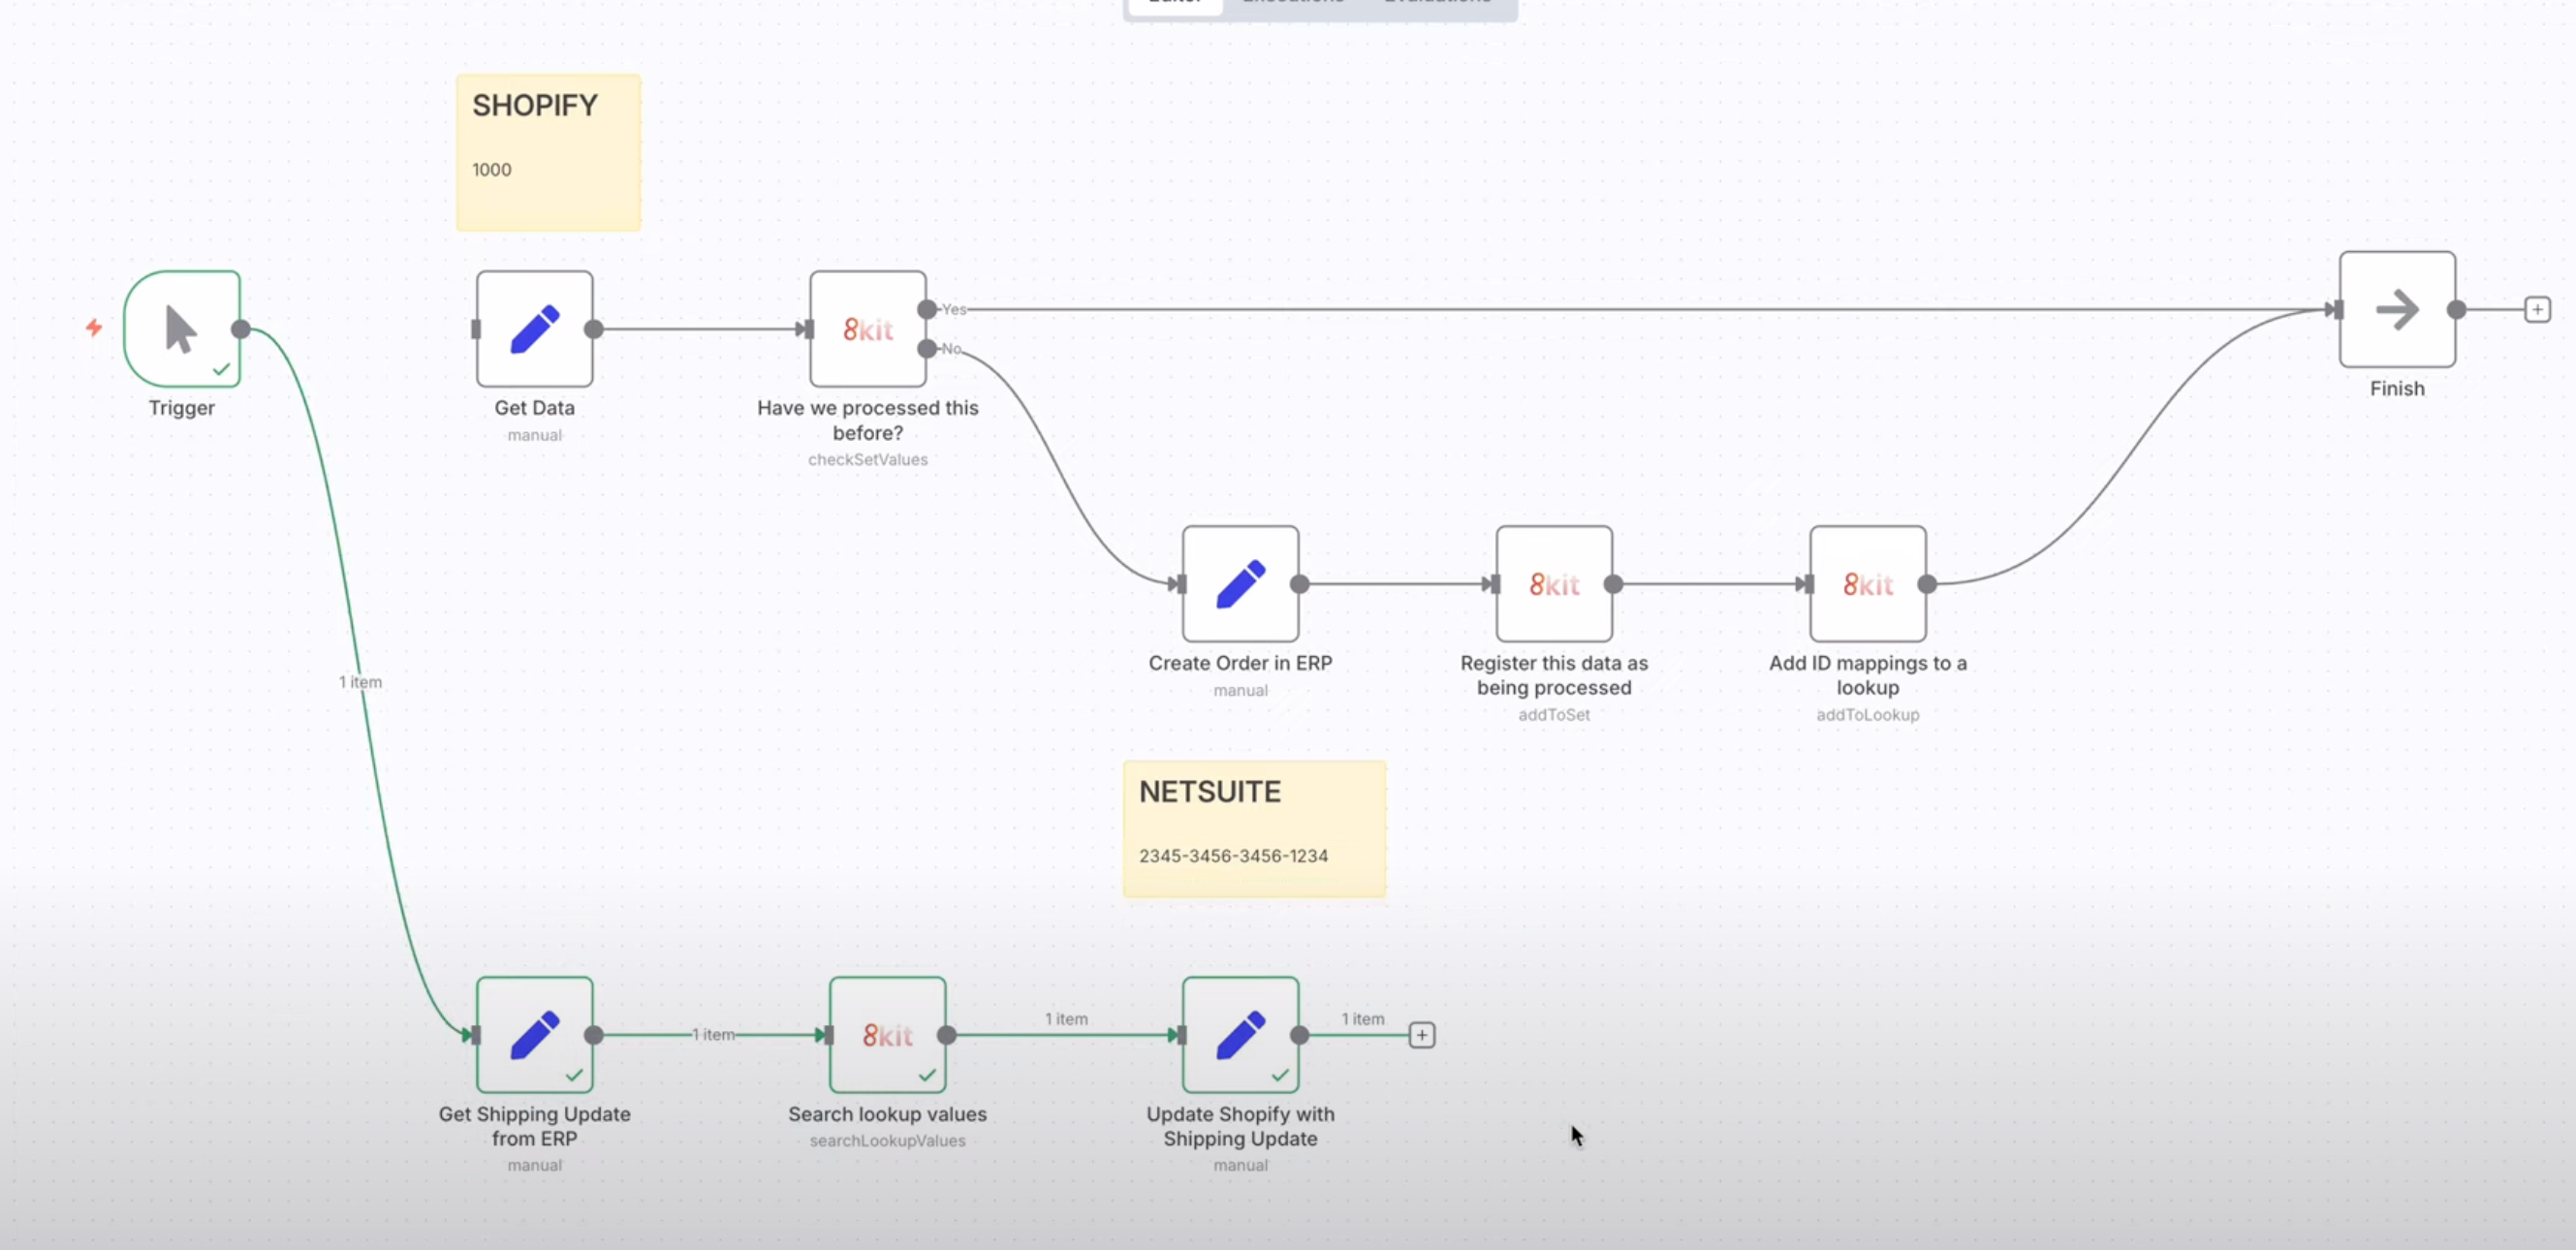
Screenshot: Complete Data Mapping Pattern - Full workflow with all components connected
Next Steps
Now that you understand the Data Mapping Pattern:
- Try the Exclusivity Pattern for resource coordination
- Learn the Temporal Pattern for incremental polling
- Combine patterns for complex integrations
Ready to implement? Start with a simple two-system integration and gradually add complexity as you become more comfortable with the pattern.